Procedures allow you to standardize your investigation process. Within a procedure, you can set up phases and steps, allocate a timeline for those steps, attach policy documents to the procedure, and customize the procedure’s coverage.
Note: Only certain users can adjust procedure settings. Learn more about user permissions, or contact your administrator to request access.
View All Procedures
There are two ways to view all procedures, their phases and steps, and related coverage.
- Click on the School Sites tab on the Left Navigation Menu to view all campuses in a table view. Click the three dots under the Actions column, then click Procedures.

- From the Manage Campus Screen, click the Procedures Tab on the Top Navigation Menu

Manage Procedures
Note: A procedure cannot be deleted, edited, renamed or archived if it is in use for an active case. This includes making any changes to Phases and Steps within the procedure.
To edit, duplicate, or delete a procedure not actively in use, click on the name of the procedure, or click on the three dots next to the procedure name. 
To archive or inactivate a procedure not actively in use, click on the name of the procedure, or click on the three dots next to the procedure name, then click Edit at the top right of the screen.

- On the procedure screen, click Edit at the top right of the screen.
- Click the Active Toggle to the right of the procedure title to mark the procedure as active or inactive.
- Click the Update Button at the top right of the screen to save your changes.
Add a New Procedure
To add a new procedure, click on the New Procedure Button on the top right of the screen.

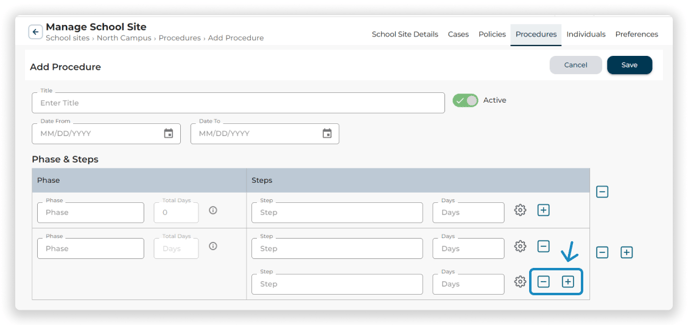
Create and Remove Phases and Steps

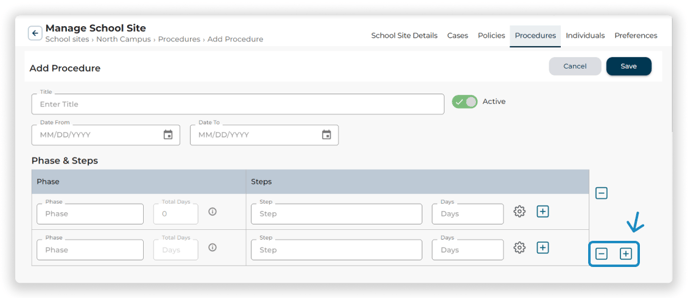
To add or remove a step, use the Plus and Minus Icons on the outside of the table.
Note: You can go back and edit a phase or step at any time, as long as the procedure has not been used in a case in progress.
Set Timelines for Phases and Steps
Enter the number of days allocated to the step in the Days box under the step column.

The total number of days allocated to the phase will update automatically based on the number of days entered for each step.

Configure Step Settings, Meetings, and Actions
- Click the Settings Icon next on the right-hand side of the step.
- Meeting Required: If a meeting is required during the step, use the checkboxes to select which users are required to schedule a meeting with you. An icon of a calendar will appear in the step. Use the checkboxes to select which users you would like this setting to apply to.
- Mark as Important: When a step is marked as important, an orange flag icon will display by the step. Use the checkboxes to select which users you would like this setting to apply to.
- Action Required: If an action is required by Case Managers or one of the Parties, write instructions for the required action in the Description box and use the checkboxes to select which users the required action applies to. An icon of a person with an exclamation mark will display as well.
Set Up the Procedure Coverage
Optional: Selecting any option in the coverage section prioritizes policies and procedures by displaying the highest matching results first while creating a case.

Use the checkboxes to the left of the column headings to select coverage for the entire group of properties in that column.
