Defining Users and Individuals
“Individuals” refers to the students and employees in your institution who are involved in cases or who have been added through an integration with your people information software. “Users” refers to those who have special permissions in Case Tracker to help manage cases. Users can include administrative users, account managers, or those who "manage" aspects of a case, such as the investigation, hearing, or appeal process.
Note: Learn more about user roles and permissions, or contact your Administrator to request access to manage users.
Admins
Find All Administrative Users on Your Account
To view a list of all administrative Users, click on the Users tab on the Left Navigation Menu. The table view displays information about each user and their role. To review any User’s access Case Types, click on their name to open the Manage User.

- Filter: Click the Filter Icon on the top right of the table. In the dropdown that appears, choose the properties that you would like to filter by and click Apply.
- Sort: Click on the column heading that you would like to sort by. An arrow will appear next to the heading that indicates the sort order. Click the arrow again to reverse the sort order.
- Adjust Columns: Click the Settings Icon on the top right of the table to select which columns appear on the table.
- Search: Use the Search Bar at the top left of the table to search for a user’s name.
- Download: Click the Download Icon at the top right of the table to download the entire user list to a .CSV file.
Add User to Your Account
To add a new admin, click New User at the top right of the screen.
On the Add User page, enter contact information for the new user and select their role.
Choose the appropriate school site(s) and case type(s) using the corresponding dropdowns.
Note: Access to cases (if any) will be limited according to the selected Role, Case Types, and School Sites/Campuses.
You can enter any notes associated with the user into the description text box. Notes entered here will only be visible to admins.
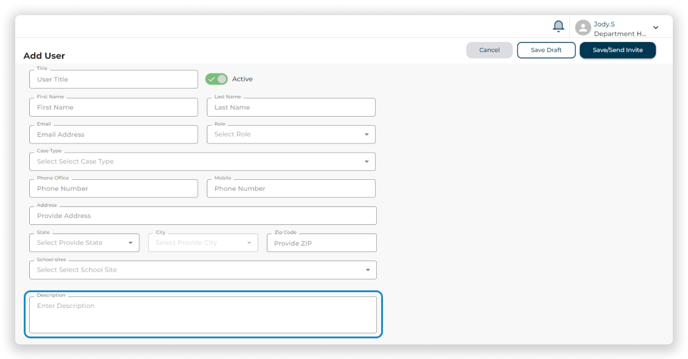
Click Save/Send Invite at the top right of the screen to invite the user to Case Tracker. They will receive an email with a link to join. If Save Draft is chosen, no invite will be sent.
Edit an Admin’s Role, Email, or Contact Information
To edit a User's role or details, locate the desired user in the All Users Table and click on their name to open the Manage User Page.
On the Manage User Page, click Edit at the top right of the screen.
 On the Edit Screen, enter the new information and click Update at the top right of the screen to save your changes.
Deactivate an Admin
Note: A user cannot be deactivated if they are still assigned to a case.
To deactivate a User on your account, locate the desired person in the All Users Table and click on their name to open the Manage User Page.
On the Manage User Page, click Edit at the top right of the screen.
On the Edit Screen, click the Active/Inactive Toggle to change the user to Inactive. Click Update at the top right of the screen to save your changes.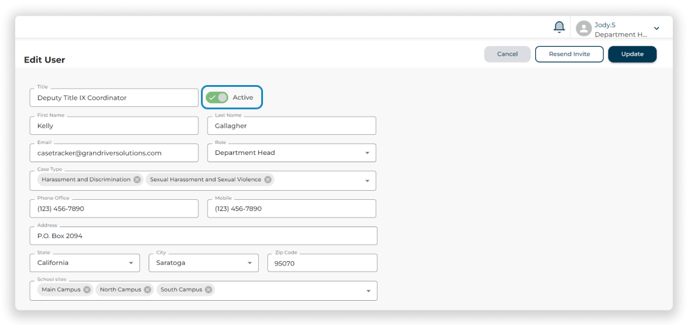
When a user’s account is deactivated, they will not be able to log in to Case Tracker and you will not be able to assign cases to them.
Case Parties
Invite Case Parties
To invite a respondent or complainant to use Case Tracker, click School Sites/Campuses on the Left Navigation Menu, then click the name of the campus that the individual is associated with.
On the Manage School Site page, click the Individuals tab at the top of the page.

Locate the respondent or complainant by searching by their name, email address, or ID.
After verifying the email address appears correct, click Send Invite at the top of the page to invite them to use Case Tracker. They will receive an automated email notification with an invitation to create their Case Tracker account.
Note: Witnesses should not be invited to Case Tracker. You can communicate with them through correspondence. The email address entered in Case Details will be used.

Adding an Individual
If the individual you want to invite is not found in a search, you can add them as a New Individual.
Important: Any individuals added to Case Tracker directly through a case should show up in this School Site/Campus area when searching. Also, if you are integrating data from your student or employee data system, most of your individuals will likely be in the system already.
To add a new individual, click New Individual at the top right of the Individuals table.

Enter contact and demographic information for the new individual as known or required. You will receive an error if you enter an email address that is already associated with another individual in this area of Case Tracker.
Note: The email address listed in an individual's Case Details screen is used for correspondence in a case, which may be different than what you enter here. The email address you enter here will be used to invite a party to Case Tracker.
To save the individual without sending an email invitation, click Save at the top of the page.
Click Send Invite at the top of the page to invite them to use Case Tracker. They will receive an automated email notification with an invitation to create their Case Tracker account.

To save the individual without sending an email invitation, click Save at the top of the page.

Reminder: Witnesses should not be invited to Case Tracker. You can communicate with them through correspondence. The email address entered in Case Details will be used.